LakesGeneral

Author name: progoez

Patio Construction
Blog, Patio Construction

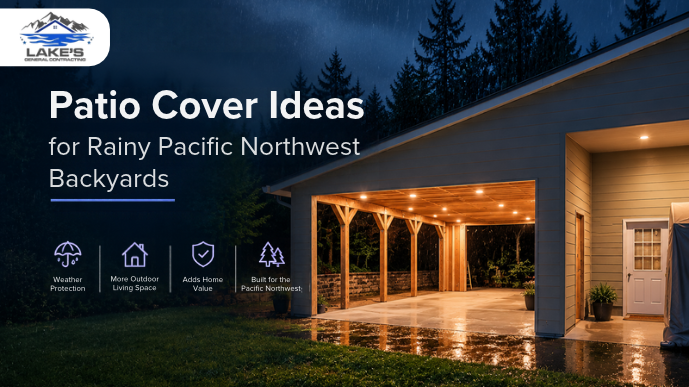
Patio Cover Ideas for Rainy Pacific Northwest Backyards

Key Takeaways The best patio cover ideas for the Pacific Northwest focus on keeping rain off without blocking light. An attached aluminum or wood cover with a solid roof gives the most protection, polycarbonate panels let daylight through, and a freestanding pavilion works where attaching to the house isn’t practical. Expect about $20 to $50 per square foot installed for most covers. In Clark County, plan on a permit and proper drainage for any covered patio. Most backyard patios in Southwest Washington sit empty from October to May. Nobody wants to be outside, but sitting in the rain isn’t much fun. A patio cover changes that. It’s one of the few outdoor projects that adds months of usable space every year. This guide covers the patio cover ideas that work best in a wet climate, the materials that hold up, what a covered patio costs, and the permit basics for homes in Vancouver, La Center, and the rest of Clark County. Why a Covered Patio Makes Sense in the Pacific Northwest Year-round outdoor living despite the rain From Vancouver to La Center, Ridgefield and Woodland, our winters are wetter than cold. Under a good cover, a morning coffee, a barbecue, or a night by a heater stays comfortable through most of the year. Add lighting, a ceiling fan or a heater and a patio starts working like an extra room. Protecting decks, pavers and outdoor furniture Constant rain is hard on everything outside. Wood decks grey, cup, and rot faster. Pavers grow moss and shift as water washes out the base. Furniture cushions never quite dry. A cover keeps the worst of it off, which means less cleaning, less deck restoration, and longer-lasting furniture. Popular Patio Cover Styles Attached solid-roof patio covers An attached cover connects to the house on one side and sits on posts on the other. It’s the most popular choice here because it gives full rain protection and makes the patio feel like part of the home. A solid roof can be a simple shed slope or a gable that matches the house. The detail that matters most in our climate is the connection to the house. The ledger board has to be properly flashed so water running down the wall doesn’t end up behind your siding. Freestanding pergolas and pavilions A freestanding structure stands on its own posts and footings. A traditional pergola has an open slatted roof, which looks great and gives some shade but won’t keep rain off. A pavilion or a pergola with a solid or louvered roof will. Freestanding covers are a good fit for a patio away from the house or a hot tub area. Translucent (polycarbonate) covers for natural light The biggest complaint about solid covers in the Northwest is that they make the house darker, especially in winter. Translucent polycarbonate panels solve that. They block rain and most UV while letting daylight through, so the rooms behind the patio stay bright. They’re a smart choice when the patio sits outside a kitchen or living room window. Deck covers and carport-style covers A cover doesn’t have to sit over a patio. A deck cover protects an existing deck the same way, and a carport-style cover keeps a car, boat, or firewood dry. These often use the same posts, beams, and roofing as a patio cover, just sized for a different job. Best Materials for a Patio Cover Material Installed cost per sq. ft. Best for Watch out for Wood 20–40 open lattice; 60–120 solid Natural look, matching the house Needs sealing or staining every few years Aluminum 20–50; insulated panels 30–60 Low maintenance, won’t rot Plainer look; basic panels can be noisy in rain Polycarbonate 20–75 depending on brand Letting light through Needs occasional cleaning to stay clear Cost ranges from HomeGuide’s covered patio cost guide, 2026. Wood Cedar and pressure-treated lumber are the classic choices. Wood looks warm, can match your house trim, and is easy to customize. In our climate, it needs a good sealer or stain from day one and a fresh coat every few years. Untreated wood will grey, check, and eventually rot. Aluminum Aluminum doesn’t rot, rust, or need painting, which makes it the lowest-maintenance option for a wet climate. Insulated aluminum roof panels add a foam core that quiets rain noise and keeps the space a bit warmer, and they can carry recessed lighting. Many aluminum systems come in wood-grain finishes. Polycarbonate panels Polycarbonate is a tough, lightweight plastic that comes in clear, bronze, and opal tints. Multiwall panels add some insulation and diffuse the light. Panels are usually mounted on a wood or aluminum frame, so you can combine materials: a cedar frame with a polycarbonate roof is a popular Northwest look. Patio Construction Basics: Pavers, Concrete or Deck? A cover is only as good as what’s under it. If you’re starting from grass, the patio itself is part of the project. Here’s how the three common bases compare: •     Poured concrete: about $4 to $30 per square foot depending on finish, with most homeowners paying $1,919 to $5,394, according to Angi’s concrete patio cost data. Durable and easy to clean. •     Paver patio: about $8 to $25 per square foot, per HomeAdvisor’s paver patio cost guide. Pavers drain better between joints and are easy to repair, but they need a well-compacted base to stay level in wet soil. •     Deck: a good choice on sloped lots or where you want the patio level with the back door. Not every deck can carry a roof, which is covered in the FAQ below. Whichever you choose, plan the drainage first. Water from the cover’s gutters and downspouts needs somewhere to go other than your patio or foundation. Lake’s handles patio construction from the base up, so the slab, pavers, cover, and drainage are planned together. Patio Cover Cost Factors According to Angi’s patio cover cost data, a professionally installed patio cover averages about $8,500, with most
bathroom remodeling company in La Center
Bathroom Remodel, Repair & Upgrades, Blog

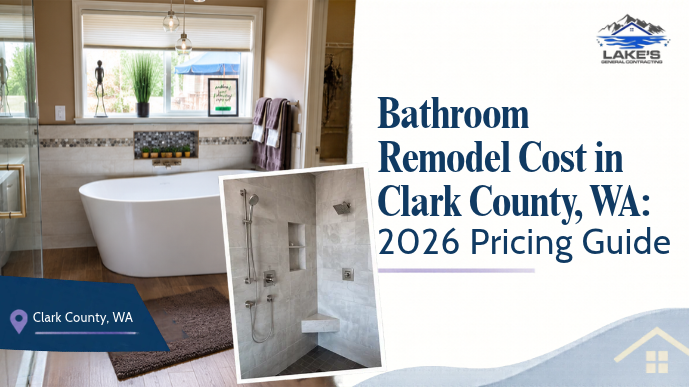
Bathroom Remodel Cost in Clark County, WA: 2026 Pricing Guide

Key takeaways A bathroom remodel in Clark County, WA typically costs anywhere from about $3,500 for a small refresh to $28,000 or more for a full midrange remodel, and $80,000-plus for a high-end primary bathroom. The final number depends mostly on size, whether you move plumbing, the tile and fixtures you choose, and what turns up behind the walls. A bathroom remodel is one of the most common projects homeowners take on, and one of the hardest to budget. Online prices range from a few thousand dollars to six figures, and most are national averages that don’t reflect labor costs in Southwest Washington. This guide breaks down bathroom remodel costs by project size, explains what pushes the price up, and covers permits and timelines for homes in Vancouver, La Center, and the rest of Clark County. People also read: 5 Budget-Friendly Remodeling Ideas for Your Bathroom5 Comprehensive How-to-do Ideas for Common House Repair Services Average Bathroom Remodel Cost by Project Size Project What it usually includes Typical cost Small bathroom refresh New vanity, toilet, fixtures, lighting, paint, maybe flooring. Layout stays the same. About 3,500–12,500 Mid-range full remodel Gut to the studs, new tub or shower, tile, vanity and fixtures About 15,000–28,000 High-end primary bathroom Larger room, custom tile shower, freestanding tub, double vanity, layout changes About $80,000+ Sources: Angi bathroom cost data (national and Portland metro, 2026) and the Cost vs. Value Report 2025, Pacific region. Small bathroom refresh A refresh keeps everything where it is and replaces what you see: the vanity, toilet, faucets, mirror, lighting, and paint, sometimes with new flooring. According to Angi’s bathroom remodel cost data, a 50-square-foot bathroom typically runs about $3,500 to $12,500. Half baths and powder rooms can come in lower. This is the range for a small bathroom remodel in most hall baths and guest baths. If your list is mostly small fixes like recaulking, a new fan, or a loose towel bar, handyman services may cover it without a full remodel. Mid-range full remodel A mid-range remodel takes the room down to the studs and replaces everything: tub or shower, tile, vanity, toilet, lighting, and fan. In the Portland-Vancouver area, Angi puts the average bathroom remodel at about $15,105, with most homeowners spending $7,699 to $22,695. For a complete midrange bathroom renovation, the Cost vs. Value Report 2025 puts the Pacific-region average at $27,710. That project assumes a 5-by-7-foot bathroom with a new tub, tile surround, toilet, vanity, lighting, and ceramic tile floor. High-end primary bathroom remodel A primary bathroom remodel usually means a bigger room and bigger choices: a custom tiled walk-in shower, a freestanding tub, a double vanity, heated floors, and often a new layout. The Cost vs. Value Report puts an upscale bath remodel in the Pacific region at $86,863. Angi notes that luxury remodels can exceed $80,000. What Drives Bathroom Remodeling Costs Two bathrooms the same size can land $20,000 apart. These are the factors that make the difference. Layout changes and plumbing relocation Keeping the toilet, sink, and shower where they are is the single biggest way to control cost. Moving a drain means opening the floor, rerouting pipe, and often reworking the framing underneath. Angi estimates that changing plumbing and electrical locations adds about $5,000 to a project. Moving a toilet is usually the most expensive move because of the size of the drain line. Tile, fixtures and vanities Finishes are where budgets drift. Angi puts midrange tile at about $10 to $50 per square foot installed, and a fully tiled shower adds up fast. Stock vanities with a premade top run about $100 to $2,600, while a custom vanity can add up to $10,000. Fixtures follow the same pattern: the same faucet layout can cost $150 or $1,500. For floors, waterproof luxury vinyl plank is a popular budget choice in bathrooms. Our guide to LVP vs. laminate vs. hardwood explains why laminate and solid hardwood don’t belong in a full bath. Hidden water damage and subfloor repairs Bathrooms hide problems. A slow leak at the toilet flange or behind a tub surround can rot the subfloor and framing for years before it shows. In older homes around La Center, Ridgefield, and Woodland, many of them were built over damp crawl spaces; it’s one of the most common surprises once demolition starts. Build a contingency of 10% to 20% into your budget for this. If the damage is extensive, it may need water damage repair before the remodel can continue. A good contractor will stop, show you the problem, and give you a written price before going further. Permits and labor Labor is typically 40% to 65% of a bathroom remodel budget, according to Angi, because the work involves several trades in a small space: demolition, plumbing, electrical, drywall, tile, and finish carpentry. Permit fees are a smaller line, usually a few hundred dollars to about $1,000, but skipping them can cost far more at resale or inspection time. Bathroom Upgrades Worth the Investment Not every upgrade pays you back, but these four tend to add the most for everyday use and for resale. Tub-to-shower conversion A tub-to-shower conversion replaces a rarely used tub with a walk-in shower. Angi puts the average at about $3,000, with most projects between $1,500 and $15,000. A prefab shower kit sits at the low end. A custom tiled shower with glass doors and new plumbing sits at the high end. One caution: if it’s the only tub in the house, keep in mind that families with young children often want one, which can matter at resale. Walk-in and curbless showers A walk-in shower remodel averages about $9,000, with most between $6,000 and $12,000, per Angi. A curbless shower takes it a step further, with no step at all. It needs a custom-sloped floor and careful waterproofing, so it costs more, but it’s easier to clean and works for every age and ability. Grab bars and accessibility upgrades Grab bars, a handheld shower, a bench, and a comfort-height

kitchen cabinet installation
Blog, Licensed General Contractor

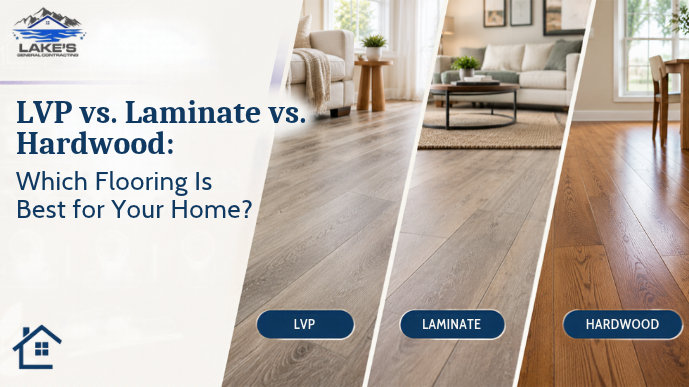
LVP vs. Laminate vs. Hardwood: Which Flooring Is Best for Your Home?

Quick Comparison: LVP vs. Laminate vs. Hardwood Factor LVP Laminate Hardwood Water Waterproof planks in most rigid-core products Water-resistant at best Least tolerant of water Scratches Good, depends on wear layer Very good Scratches and dents most easily Installed cost per sq. ft. About 2.50–13.50 About 3–13 About 8–31 Can be refinished No No Yes (solid, and some engineered) Resale value Good Fair Highest Water resistance LVP is made of vinyl layers over a rigid core. The two common cores are SPC (stone-plastic composite), which is denser and resists dents better, and WPC (wood-plastic composite), which is thicker and a little softer underfoot. The planks themselves don’t absorb water, but water can still seep through the seams, so a big leak can reach the subfloor underneath. Laminate is a photo layer over a core of pressed wood fiber. Newer water-resistant laminates handle surface spills much better than older ones. But when MassLandlords soak-tested several off-the-shelf laminates for two days, including products sold as waterproof, none held up as truly waterproof. Hardwood is real wood, so it absorbs water. Standing water can stain, cup, or warp the boards. Durability and scratch resistance Laminate has a hard, clear top layer. It’s rated by AC class, from AC1 for light foot traffic up to AC5 for busy commercial spaces. LVP’s protection comes from its wear layer, measured in mils. For high-traffic areas, look for a wear layer of at least 12 mils. Vinyl is softer than laminate, so heavy furniture can dent it. Hardwood scratches and dents most easily, but species matter. Harder woods like hickory and white oak rate well above walnut or cherry on the Janka hardness scale. The upside of any solid hardwood is that it can be sanded and refinished. People also read: Deck Repair vs. Replacement: How to Know What Your Deck NeedsWater Damage Restoration Process: What to Do in the First 48 HoursHandyman vs. General Contractor: Who to Hire for Your Home Repair Project Cost per square foot (materials + installation) On a 500-square-foot main floor, a mid-range LVP at $6 installed comes to about $3,000. Mid-range hardwood at $15 installed comes to about $7,500. Removing old flooring, subfloor repairs, stairs and transitions add to either number. Look, feel and resale value Good LVP and laminate look much more like wood than they used to. They still feel different underfoot. Laminate can sound hollow, and vinyl feels a little softer and warmer. Real wood still wins at resale. In the 2022 Remodeling Impact Report from NAR and NARI, refinishing hardwood floors recovered an estimated 147% of its cost when a home sold. New wood flooring recovered 118%. Luxury Vinyl Plank (LVP): Pros and Cons Pros: waterproof planks, comfortable and fairly quiet underfoot, low maintenance, and quick click-together installation. Cons: can dent under heavy furniture, can’t be refinished, and quality varies a lot. Thin, cheap LVP often looks like plastic. Best rooms for LVP Kitchens, bathrooms, laundry rooms, mudrooms, basements and rentals. Anywhere water shows up, LVP is the safe choice. Laminate Flooring: Pros and Cons Pros: tough against scratches, usually budget-friendly, and a realistic wood look. Cons: the core can swell if water sits on it, it can’t be refinished, and it can sound clicky without a good underlayment. Best rooms for laminate Living rooms, bedrooms, hallways, and home offices. These dry, busy spaces let laminate’s scratch resistance shine. Hardwood Flooring: Pros and Cons Pros: real wood, a long life, and the strongest resale value. HomeAdvisor says solid hardwood lasts 30 to 100 years. Cons: the highest cost, sensitivity to water and humidity, and more visible scratches. Solid vs. engineered hardwood Solid hardwood is one thick piece of wood. It can be sanded and refinished many times, but it moves with humidity and doesn’t suit basements or bare concrete. Engineered hardwood has a real wood top layer over plywood layers. It handles humidity swings better and, depending on the product, can go over concrete. It can only be refinished as many times as its top layer allows. HomeAdvisor puts engineered at about $5 to $20 per square foot and solid at about $10 to $25. Best Flooring for Damp, Rainy Climates Like Clark County Our long wet season brings muddy boots, wet dogs, and damp crawl spaces. Floors near the door and over concrete take the most abuse. Moisture can also come from below. Many local homes sit over crawl spaces, so before new floors go in, it’s worth checking that the crawl space has an intact vapor barrier on the ground and decent ventilation. A damp crawl space will work its way into any floor above it, including “waterproof” ones. Kitchens, bathrooms and mudrooms LVP is the clear pick here. Skip laminate and solid hardwood in full bathrooms, where splashes and steam are daily. If a leak has already soaked your floor, deal with the water first: our water damage repair team can dry out and repair the subfloor before anything new goes down. New floors are also a common part of a bathroom remodel or a kitchen upgrade. Homes with pets and kids For claws, laminate’s hard top layer holds up best. For spills and accidents, LVP is safer. Many families use both: LVP in the kitchen and entry, laminate in the bedrooms. If you want hardwood, a harder species with a matte finish hides scratches better. What to Expect From a Professional Floor Installation Subfloor prep and moisture testing A good installer starts under the floor, not on top of it. Old flooring comes out, and the subfloor gets checked for soft spots, dips, and moisture. Moisture matters most in our climate. National Wood Flooring Association guidance, reported by Hardwood Floors magazine, says the moisture content of hardwood and a wood subfloor should be within 2 percentage points for plank flooring (boards 3 inches or wider) and within 4 points for strip flooring (under 3 inches). Concrete is usually tested with a relative humidity probe or a calcium chloride test, and LVP or

Scroll to Top